
Thanks Roy,
In the end, thinking up ways to make it stronger is the fun part, but it sure takes more time to do it. Soon we'll be on to the other side and it will be "all downhill from there"
Father and Son Comet Project (with photos)
Re: Father and Son Comet Project (with photos)

1964 Comet Caliente Convertible
30,000 miles on our rebuild
All Comets start out as dreams...
Re: Father and Son Comet Project (with photos)
I agree with Roy.
I would have parted that car out a long time ago...
But your hard work is inspiring. Makes a lot of the small stuff seem too easy .
Were pulling for a happy ending here!
Joe
I would have parted that car out a long time ago...
But your hard work is inspiring. Makes a lot of the small stuff seem too easy .
Were pulling for a happy ending here!
Joe
1965 Caliente HT- 289/4 speed
1964 Falcon HT- track car- 302/4 speed
1964 Falcon HT- track car- 302/4 speed
Re: Father and Son Comet Project (with photos)
Great Joe, NOW you tell me 
1964 Comet Caliente Convertible
30,000 miles on our rebuild
All Comets start out as dreams...
Re: Father and Son Comet Project (with photos)
You and your son are putting an amazing amount of work into that car - incredible, and mad props to you both for saving this car. I likley would have gone donor shopping after seeing some of the 'cancer'.
A fantastic learning experience though, saving what most would not bother with - I can only imagine the attachment to that car when your done - to put that much time and effort into it...just wow!
A fantastic learning experience though, saving what most would not bother with - I can only imagine the attachment to that car when your done - to put that much time and effort into it...just wow!
67 Comet
No power steering, 4-wheel drum brakes, 5 gears 'n' 400 + horsepower...
...hell yea it's fun
Re: Father and Son Comet Project (with photos)
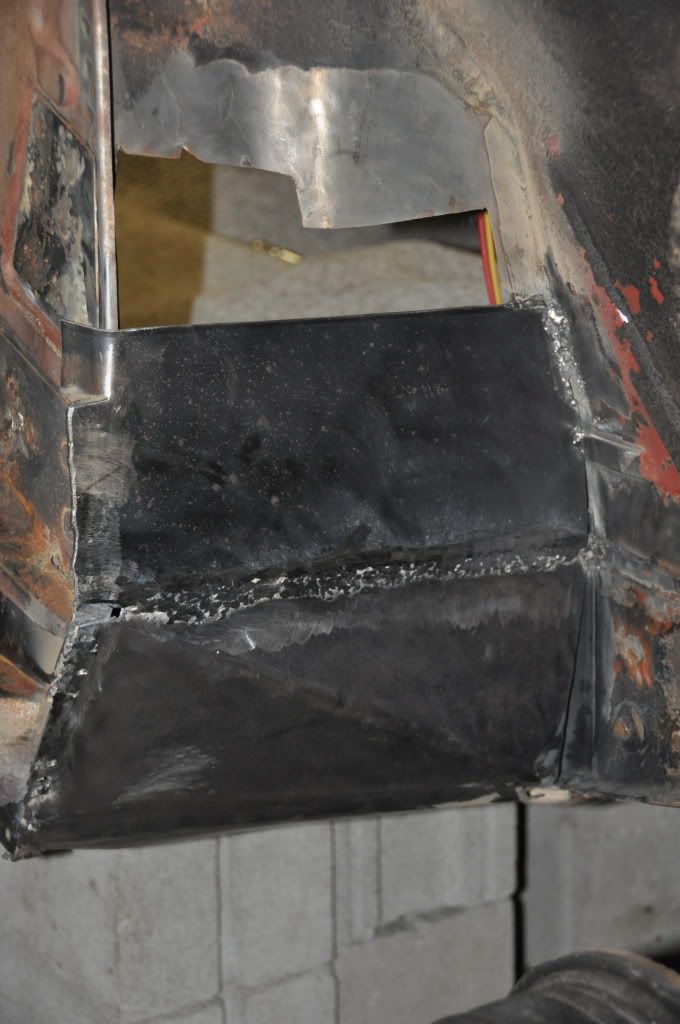
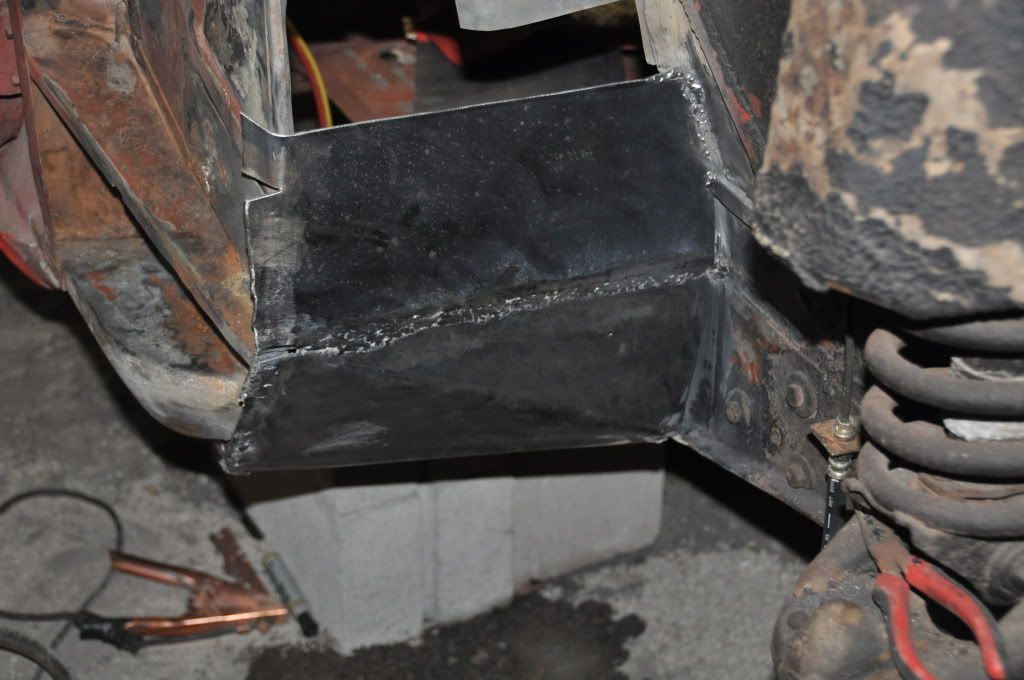
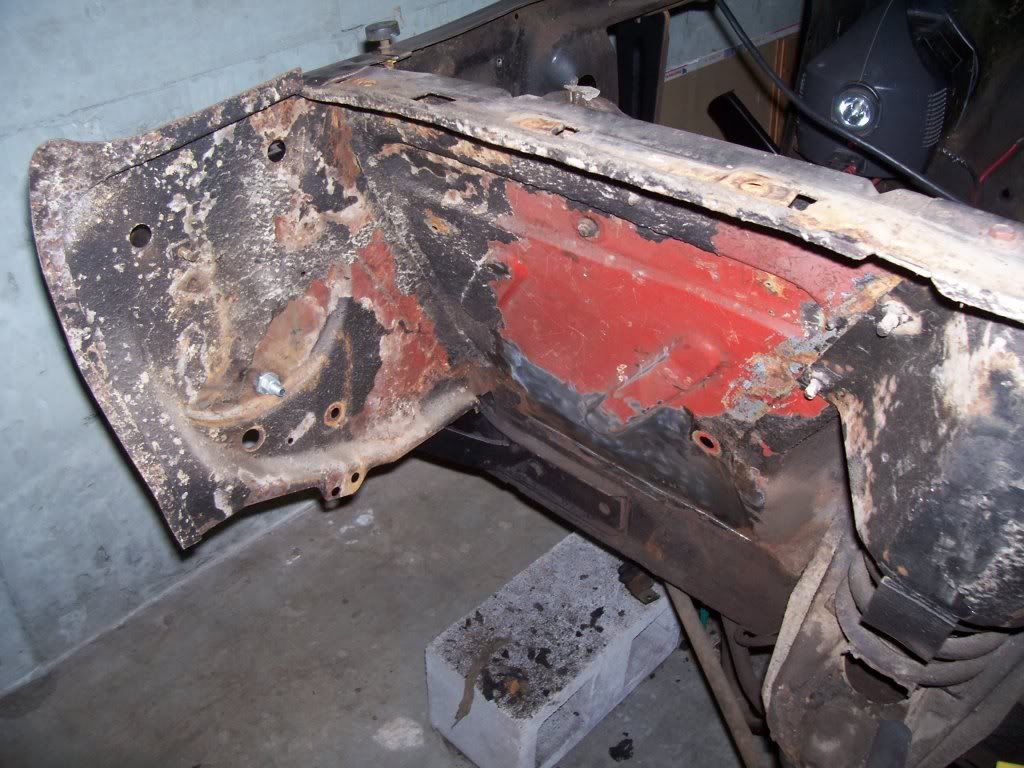
Well, I must say that I feel like I really turned a corner today by getting these two pieces in. I have been measuring and thinking for several weeks, but today I got in the replacement rear frame piece and my patented beam of excellence in the rear torque box.
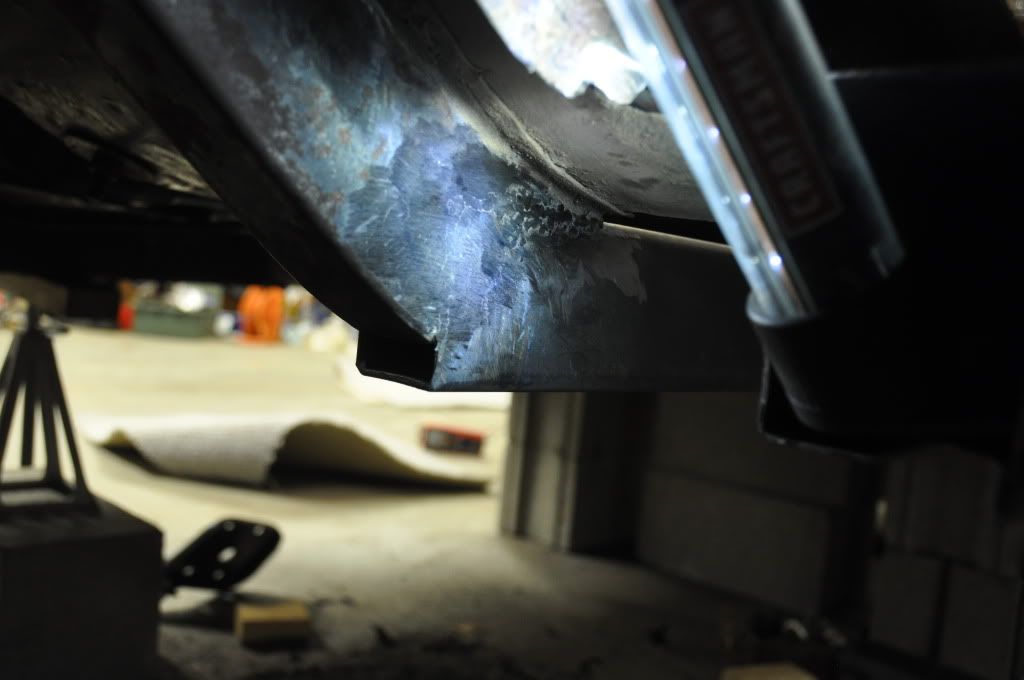
Need to close up that whole at the bottom.
Do I need to weld a sleeve inside the replacement steel rail to support the bolt for the leaf spring bushing or is this steel beam thick enough with 1/8" on both sides to support the bolt? In the original design, there is a sleeve that is pressed up in there by its attachment to the receiving end of the rear torque box frame rail piece (complicated to explain, but it was a rolled tube that the leaf spring bolt went through).
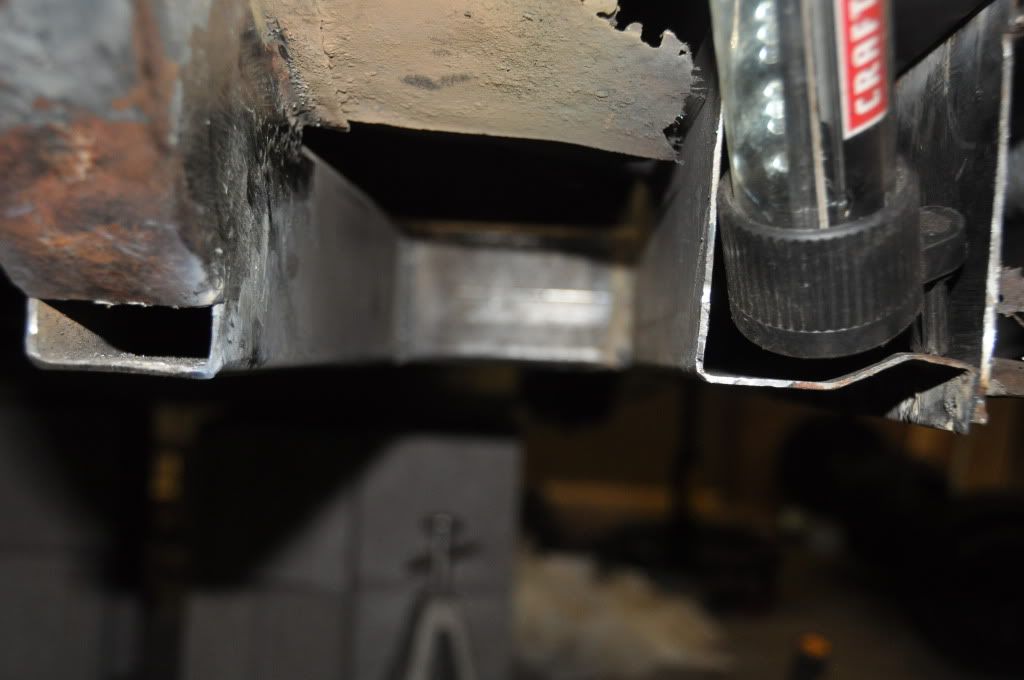
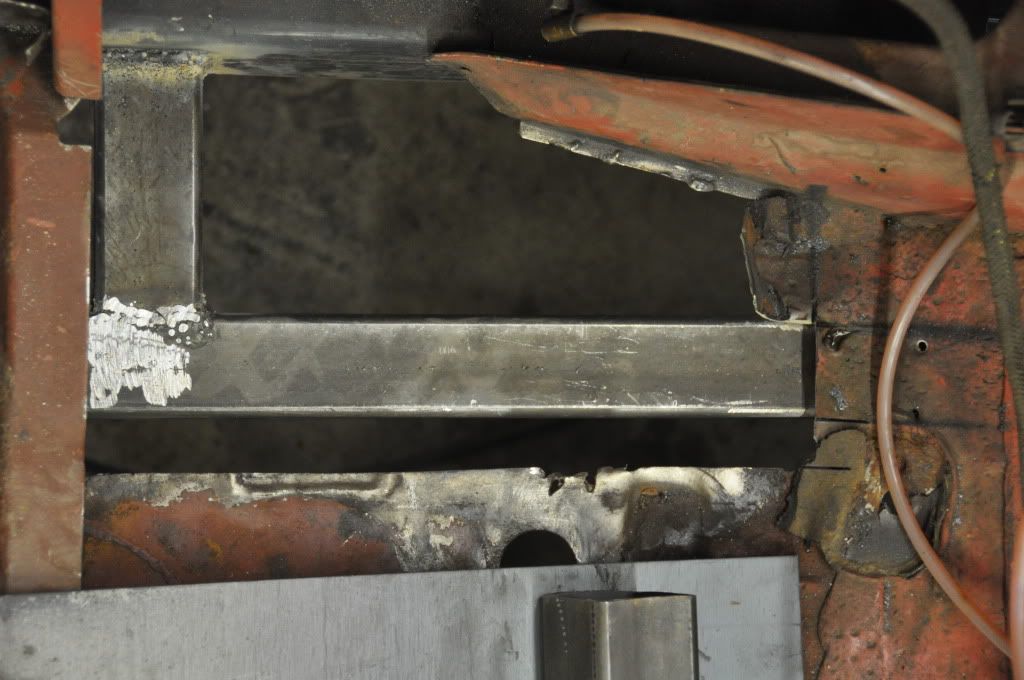
After I get the new shackle I'll weld that in and this extra cross support right up against the shackle. Then the 12g steel plate will close up the bottom and it's off to the other side.
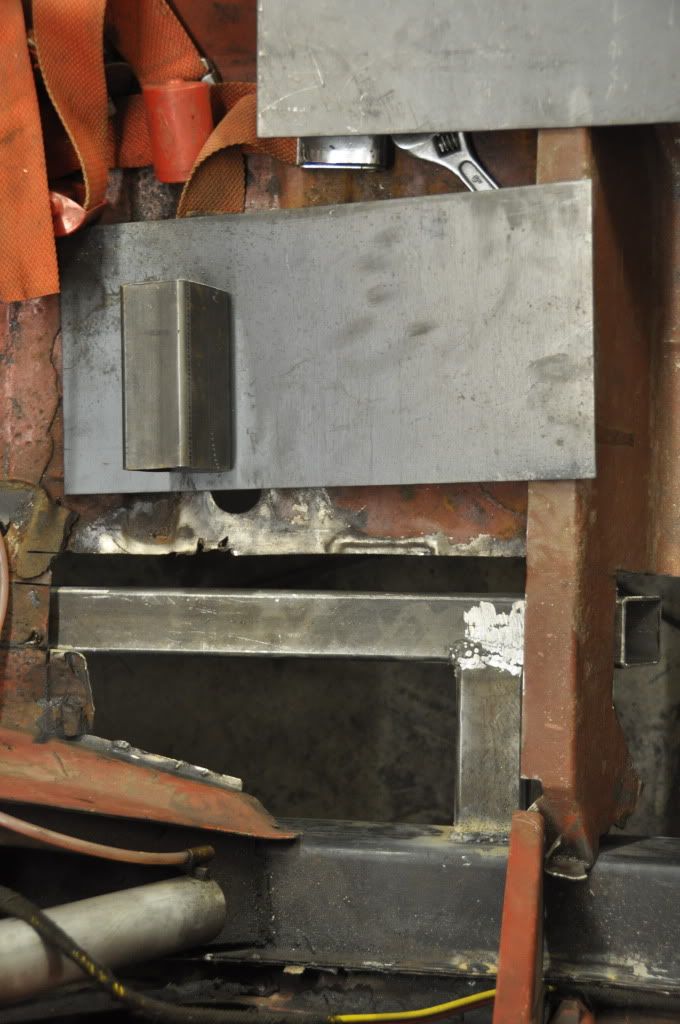
The milestone here is this marking the end of this side and starting on the other. I didn't want to start removing the other inner rocker until this side was strong enough to hold up. I think we're now good to go on.
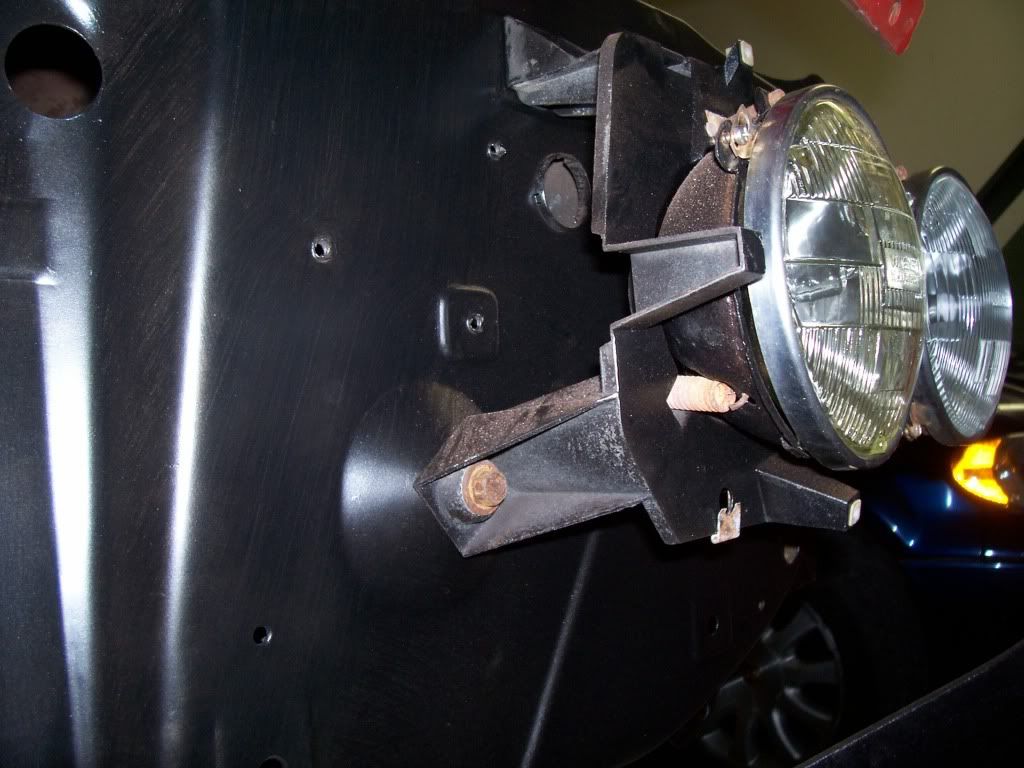
While I was on this, my son has been going through the wiring harness and getting things to work. We have the front lights working, the wipers, the side door lights, the horn (sort of).
Bonus Comet trivia...
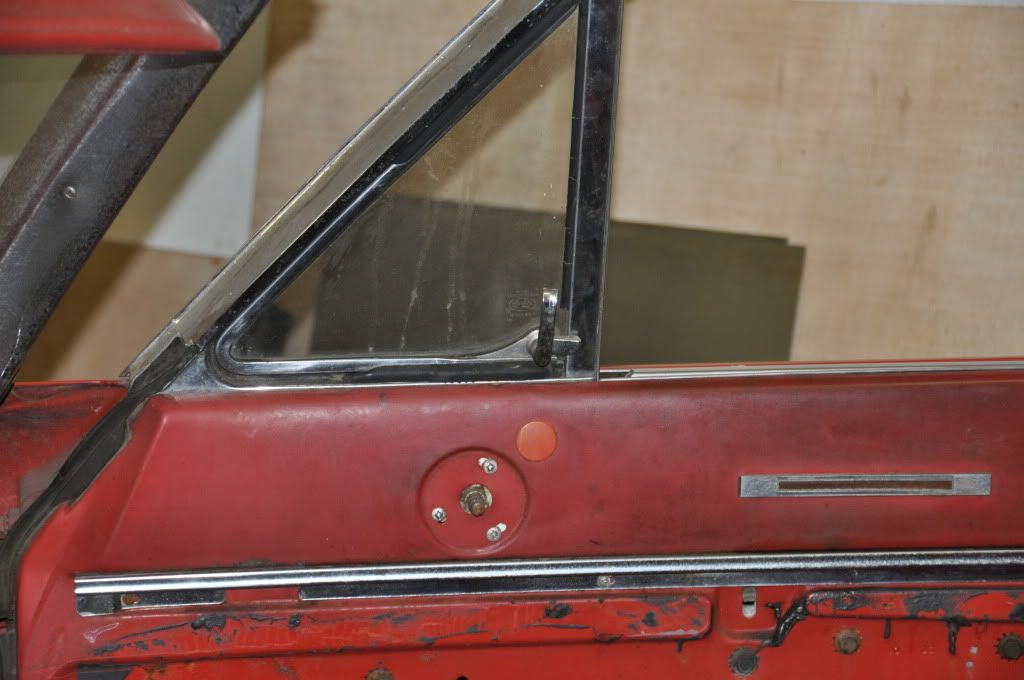
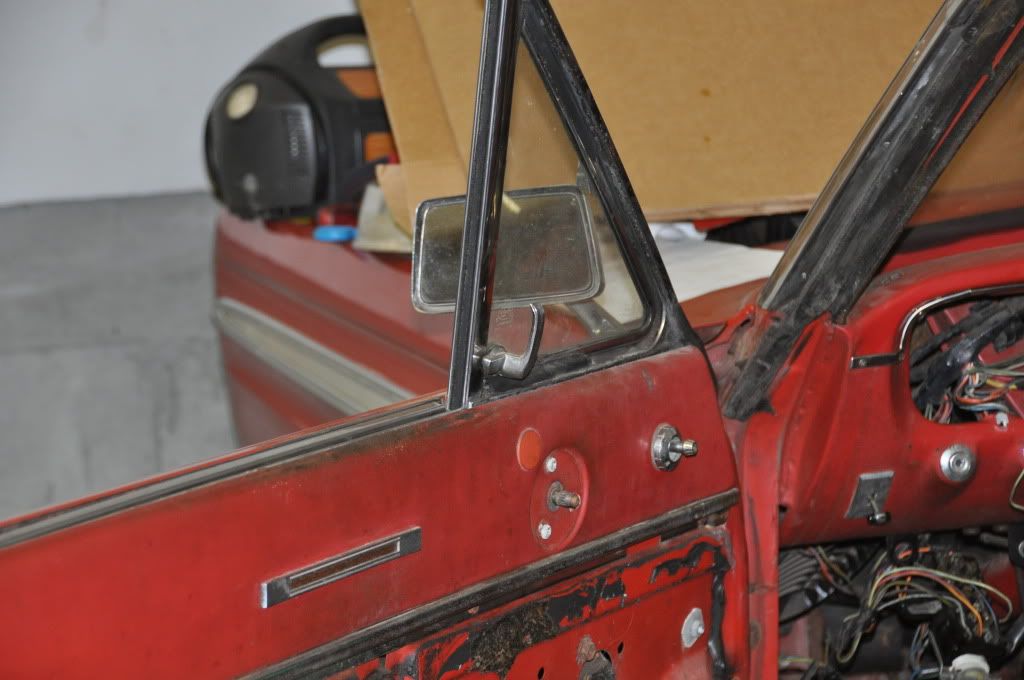
Anybody know what the plastic knock outs are for by the window vent? I thought it was for a mirror control, but there's one on the driver's side as well, and it already has the mirror control??
Need to close up that whole at the bottom.
Do I need to weld a sleeve inside the replacement steel rail to support the bolt for the leaf spring bushing or is this steel beam thick enough with 1/8" on both sides to support the bolt? In the original design, there is a sleeve that is pressed up in there by its attachment to the receiving end of the rear torque box frame rail piece (complicated to explain, but it was a rolled tube that the leaf spring bolt went through).
After I get the new shackle I'll weld that in and this extra cross support right up against the shackle. Then the 12g steel plate will close up the bottom and it's off to the other side.
The milestone here is this marking the end of this side and starting on the other. I didn't want to start removing the other inner rocker until this side was strong enough to hold up. I think we're now good to go on.
While I was on this, my son has been going through the wiring harness and getting things to work. We have the front lights working, the wipers, the side door lights, the horn (sort of).
Bonus Comet trivia...
Anybody know what the plastic knock outs are for by the window vent? I thought it was for a mirror control, but there's one on the driver's side as well, and it already has the mirror control??
1964 Comet Caliente Convertible
30,000 miles on our rebuild
All Comets start out as dreams...
-
Boss/Cyclone

- Site Admin
- Posts: 2740
- Joined: Thu Oct 19, 2006 9:55 pm
- Location: South Central Michigan (Near Michigan International Speedway)
Re: Father and Son Comet Project (with photos)
You guys are really doing a great job. I would say you do need something in that frame rail. Maybe a small piece of pipe cut to size and tacked in. Something for support and to keep the framerail from crushing when you tighten the leafspring bolts.
1965 Mercury Cyclone former drag car, 1971 Boss 351 engine, 4 speed, ladder bars, etc. Now returned to a street car.

Larry
Larry
Re: Father and Son Comet Project (with photos)
Thanks Boss. If that's the case, then I'll probably cut the bottom open a bit more and grind it with more of a curve to match the original. Then while it's open, slide a tube up in, put the bolt through, tack the piece then remove the bolt and weld around. Then I'll cap off the bottom of the rail and down the road.
1964 Comet Caliente Convertible
30,000 miles on our rebuild
All Comets start out as dreams...
-
CALIFORNIA CALIENTE
- Posts: 5933
- Joined: Mon Feb 20, 2006 12:57 am
- Location: Camarillo,California
Re: Father and Son Comet Project (with photos)
Like Boss said,you need the sleeve to keep from crushing the channel.The plastic plugs cover the adjustment bolt for the windwing,hardtops have either a Caliente or Cyclone emblem over the hole. ROY.
Real Racecars have 3 pedals

Re: Father and Son Comet Project (with photos)
Well on a day that started out with little time planned for the Comet, we ended up getting quite a bit done. The boy tackled that front torque box that has been dogging us most of the summer. We were originally planning to make it in one piece, but bending the 16 gauge with all those angles was tricky and hard to align. He finally cut a few of the pieces in geometric separates so they could be welded cleaner and now it looks pretty good.
Meanwhile, now that I've got the rear torque box strong enough to hold together (still waiting for a replacement shackle before I weld the rest of the box together), I'm on to the driver's side inner rocker, drilling out the spot welds for eventual removal. Started cutting the top piece out, but the air chisel cutting bit broke so that ended the night.

Here are a few bonus questions for those of you more knowledgeable than we are.
1. Trying to remove the turn signal bulb in the front, but it doesn't want to come out. Are they spring loaded push, twist, turn (bayonet style) or something else? We can't seem to get them out, but it may be that it's just rusted in place
2. Rear leaf springs: Can they be "restored" or something to get them back to factory resistance, or do you just replace them?
3. Any ideas for a replacement for the padding behind the door vinyl that gives it the quilted effect?
Always appreciative of the advice we get here, so keep it coming, please.
Meanwhile, now that I've got the rear torque box strong enough to hold together (still waiting for a replacement shackle before I weld the rest of the box together), I'm on to the driver's side inner rocker, drilling out the spot welds for eventual removal. Started cutting the top piece out, but the air chisel cutting bit broke so that ended the night.
Here are a few bonus questions for those of you more knowledgeable than we are.
1. Trying to remove the turn signal bulb in the front, but it doesn't want to come out. Are they spring loaded push, twist, turn (bayonet style) or something else? We can't seem to get them out, but it may be that it's just rusted in place
2. Rear leaf springs: Can they be "restored" or something to get them back to factory resistance, or do you just replace them?
3. Any ideas for a replacement for the padding behind the door vinyl that gives it the quilted effect?
Always appreciative of the advice we get here, so keep it coming, please.
1964 Comet Caliente Convertible
30,000 miles on our rebuild
All Comets start out as dreams...
-
Boss/Cyclone
- Site Admin
- Posts: 2740
- Joined: Thu Oct 19, 2006 9:55 pm
- Location: South Central Michigan (Near Michigan International Speedway)
Re: Father and Son Comet Project (with photos)
Yeah, push in and turn counter clockwise. I have had the glass part of the bulb twist off before. If that happens grab some needle nose and twist out the bulbs base. Nice work, you are making progress.Groover wrote: Here are a few bonus questions for those of you more knowledgeable than we are.
1. Trying to remove the turn signal bulb in the front, but it doesn't want to come out. Are they spring loaded push, twist, turn (bayonet style) or something else? We can't seem to get them out, but it may be that it's just rusted in place
1965 Mercury Cyclone former drag car, 1971 Boss 351 engine, 4 speed, ladder bars, etc. Now returned to a street car.
Larry
Larry
Re: Father and Son Comet Project (with photos)
Rear leaf springs can be "re-arched", but you would have to find a shop that does it. Eaton Springs does it http://www.eatonsprings.com/rearching.htmGroover wrote:2. Rear leaf springs: Can they be "restored" or something to get them back to factory resistance, or do you just replace them?
If you absolutely have to have the original springs I guess its the way to go. Otherwise new replacements are a better option.
I replaced the rear leaf springs with a new set last year and WOW! the car sat very high in the rear for awhile. I had to put 300lbs of cement bags in the trunk and drive around for them to settle. Ive heard of others having the same problem.
Joe
1965 Caliente HT- 289/4 speed
1964 Falcon HT- track car- 302/4 speed
1964 Falcon HT- track car- 302/4 speed
Re: Father and Son Comet Project (with photos)
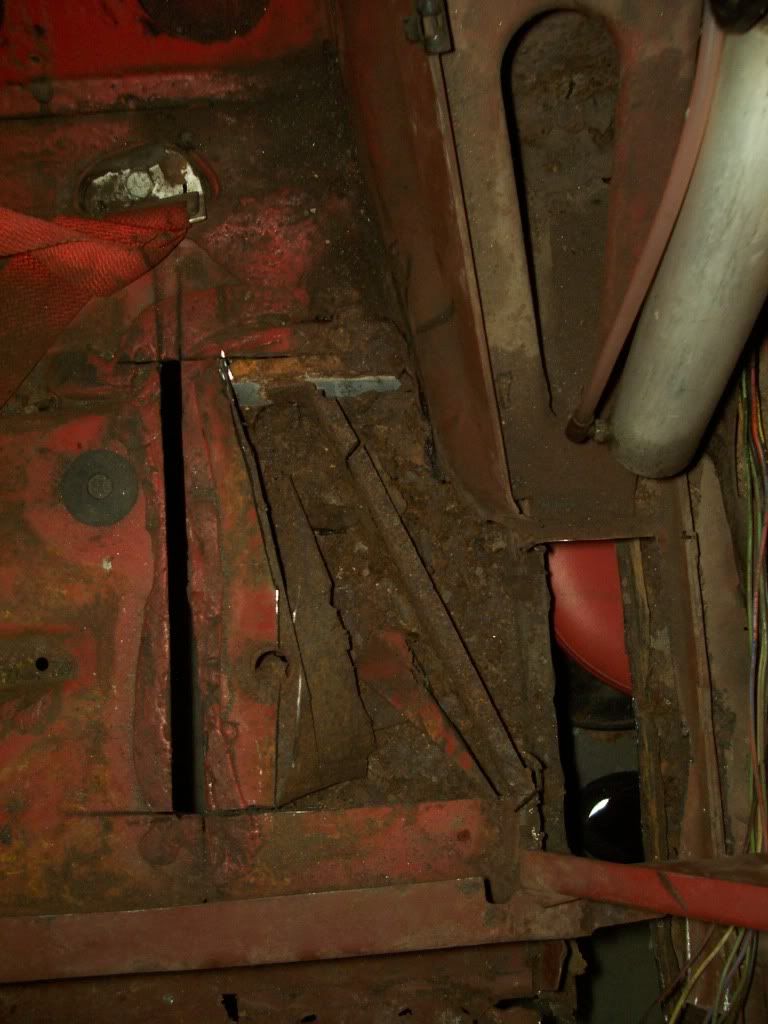
So I've been making some progress on the other side, and hope to get most of it out and start fitting the inside rocker this weekend. Here's another ugly picture of a rusty rear torque box (better than the other side because this one still has the diagonal in it) but I'm planning to remove the whole thing and replicate what I've been doing on the other side.
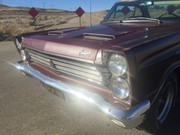
Meanwhile, my son has been cleaning up the entire front end and working his way back. But we have an original paint question.
It looks to us like the engine bay may have been originally red both inside and out. When we sand the walls down, it goes from black to red, to bare metal. The shock towers and braces are black all the way down to bare metal. The front cowl (behind the grill) looks to be have been red with black painted over it as well.
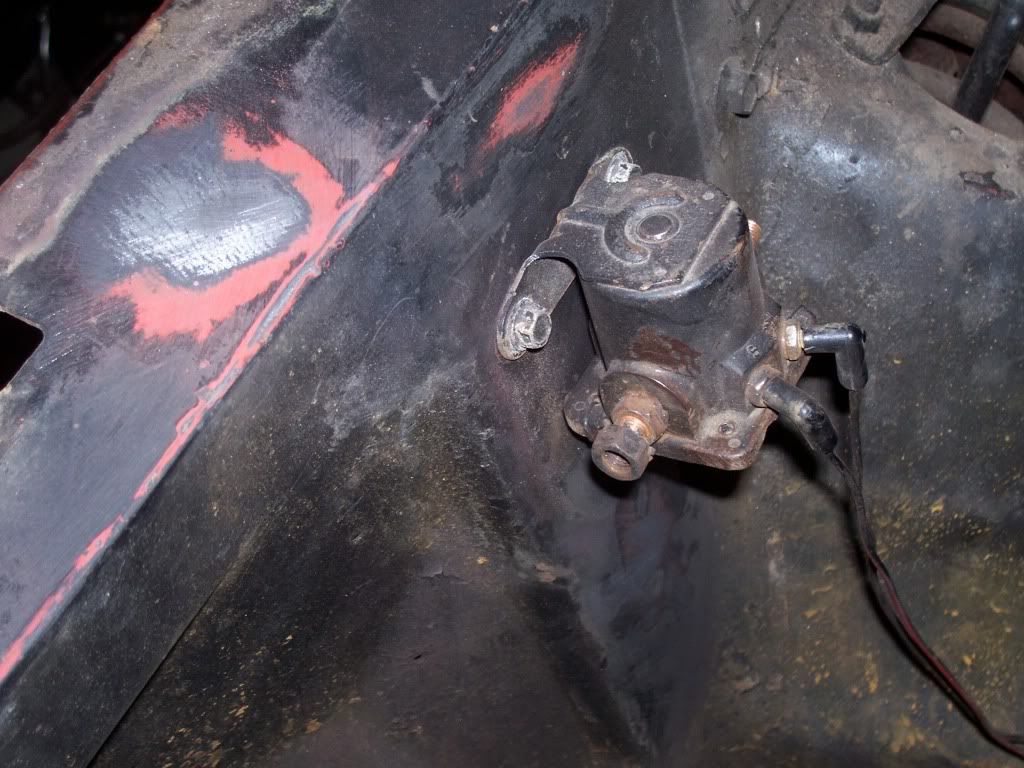

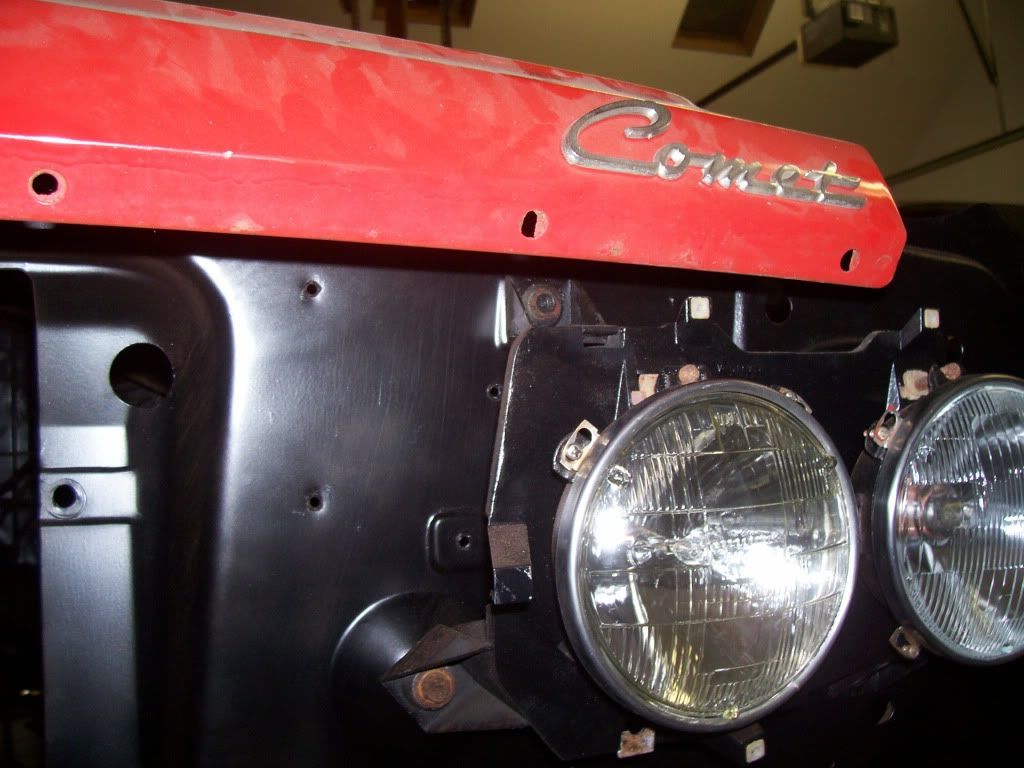
It kind of makes sense that the engine bay would have been painted red at the factory since the side walls were all attached to the body when it went through paint, while the shock towers were added later and may have already been black before they went on?
Or... did the factory paint the entire engine bay BLACK on top of the red? I've never seen a red engine bay, but it's odd that they would paint the black over the red. Wondering if a previous owner did that or not.
In simpler terms, What is the original color of the engine bay? Does it match the body color or is it black?
Meanwhile, my son has been cleaning up the entire front end and working his way back. But we have an original paint question.
It looks to us like the engine bay may have been originally red both inside and out. When we sand the walls down, it goes from black to red, to bare metal. The shock towers and braces are black all the way down to bare metal. The front cowl (behind the grill) looks to be have been red with black painted over it as well.
It kind of makes sense that the engine bay would have been painted red at the factory since the side walls were all attached to the body when it went through paint, while the shock towers were added later and may have already been black before they went on?
Or... did the factory paint the entire engine bay BLACK on top of the red? I've never seen a red engine bay, but it's odd that they would paint the black over the red. Wondering if a previous owner did that or not.
In simpler terms, What is the original color of the engine bay? Does it match the body color or is it black?
1964 Comet Caliente Convertible
30,000 miles on our rebuild
All Comets start out as dreams...
-
CALIFORNIA CALIENTE
- Posts: 5933
- Joined: Mon Feb 20, 2006 12:57 am
- Location: Camarillo,California
Re: Father and Son Comet Project (with photos)
The engine bay should be a semi gloss black as should the outside of the inner fenders.Unless you are trying to replicate an original color combo I would paint the engine bay body color.I think it makes it look clean,plus makes the engine stand out! You guys are making unreal progress,that old ragtop will be stronger than new!!! ROY.
Real Racecars have 3 pedals
Re: Father and Son Comet Project (with photos)
Thanks Roy, so are you confirming that they paint the engine bay red at the factory along with the rest of the car and then come back and paint black over the top?
Inside the wheel wells it doesn't look like they painted it black, it just looks like the spray the black undercoating. We're not finding any black paint on top of the inside fender except the shock tower, but it all looks black due to the thick undercoating.
Inside the wheel wells it doesn't look like they painted it black, it just looks like the spray the black undercoating. We're not finding any black paint on top of the inside fender except the shock tower, but it all looks black due to the thick undercoating.
1964 Comet Caliente Convertible
30,000 miles on our rebuild
All Comets start out as dreams...
-
CALIFORNIA CALIENTE
- Posts: 5933
- Joined: Mon Feb 20, 2006 12:57 am
- Location: Camarillo,California
Re: Father and Son Comet Project (with photos)
I am not confirming that the factory sprayed the inner fenders body color,I have never seen one done that way.I just think they look good done in the body color. ROY.
Real Racecars have 3 pedals