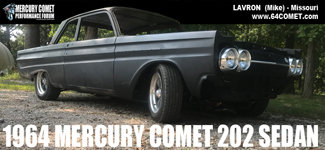
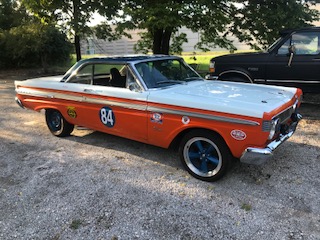
Lavron's '64 Build Thread

The Era of The Square Body Racing Comets
lavron
Site Admin
Posts: 4710
Joined: Sat Nov 01, 2003 9:17 am
Location: Missouri, Ozarks
Contact:

Re: Lavron's '64 Build Thread

Post by lavron »

Jims65cyclone wrote:You did good! How's that elephant taste? :lol:
Jim
It is not too bad in small bites, it is much better than just sitting and looking at him or her spoil.

You know it doesn't take much, I know have been working on a lot of mechanical things for awhile but this is the first time I have actually laid hands on the car, even though I didn't do much I did something, I spent maybe four hours over a two day period doing that. I mean I jumped in before I should have and had to go to town and get stuff like sandpaper and filler etc. I guess it wasn't planned but it was satisfying :? 8) Of course you know it means now I want to do more and I am not really sure it fits in my schedule, maybe if I can do one small thing (bite) at a time I can get something accomplished and eventually I will have consumed my elephant.

See Ya,
Mike
Mike's build thread
viewtopic.php?f=9&t=13058
Image

lavron
Site Admin
Posts: 4710
Joined: Sat Nov 01, 2003 9:17 am
Location: Missouri, Ozarks
Contact:

Re: Lavron's '64 Build Thread

Post by lavron »

Sometimes I move backwards trying to go forward :roll: I was pretty much done with my hood priming and filling the hood ornament indent but had one little low spot on the front edge. In town today I bought some Bondo glazing putty that cures by UV in the sun, well that is what the tube says, I ended up with a sticky mess and had to sand/grind it off, took me forever to get everything smoothed back out.

Found out there is a world of difference between pro grade primer in a spray bomb and Rustoleum, I ran out of primer so I used some of the high build Rustoleum primer and it went on super dry"ash" and has horrible orange peel, if you can even call it that, now I will have to try and DA the primer back smooth and finish blocking it.

Thinking about ordering a gallon of the Eastwood Contour Polyester Primer for the rest of the car and one of their cheap big tip HPVL guns ($30) for primer, or seeing if HF has something similar.

See Ya,
Mike
Mike's build thread
viewtopic.php?f=9&t=13058
Image

Lou's Comet
Posts: 1543
Joined: Sat Nov 26, 2011 8:56 pm
Location: Jeannette, Pa.

Re: Lavron's '64 Build Thread

Post by Lou's Comet »

lavron wrote:Sometimes I move backwards trying to go forward :roll: I was pretty much done with my hood priming and filling the hood ornament indent but had one little low spot on the front edge. In town today I bought some Bondo glazing putty that cures by UV in the sun, well that is what the tube says, I ended up with a sticky mess and had to sand/grind it off, took me forever to get everything smoothed back out.

Found out there is a world of difference between pro grade primer in a spray bomb and Rustoleum, I ran out of primer so I used some of the high build Rustoleum primer and it went on super dry"ash" and has horrible orange peel, if you can even call it that, now I will have to try and DA the primer back smooth and finish blocking it.

Thinking about ordering a gallon of the Eastwood Contour Polyester Primer for the rest of the car and one of their cheap big tip HPVL guns ($30) for primer, or seeing if HF has something similar.

See Ya,
Mike
You really want to have a plan with what system and products you want to use on your paint/bodywork and stick to it. The system doesn't have to be high end or even all one brand, (although I stick to one brand with my paint work and would suggest others do also)

My system is
1) get panel to bare metal
2) do metal work, cut out bad, weld in new, any hammer dolly work
3) 2 coats epoxy primer, IMHO this is a very important step and have seen big differences over the years epoxy vs not
4) filler work,
5) epoxy prime over filler work, don't do whole panel just over the filler area and beyond a few inches
6) primer surfacer
7) block sand with 180-220,and any finish putty if needed, if car needs blocked more repeat 6and 7 once car is straight go to 8
8 ) reapply primer surfacer and block with 400-600
9) paint

Be very careful with (or even better, stay away from) spray cans and using different brands as you go, find a decent/good brand and stick with it.

You want to use two part products, they will have a hardner's or activator. Single part products (found in spray cans) will melt?? Get funny when you put other products over them. They can also craze, lift, bubble, shrink, etc. I have a couple spray bombs of various primers in my shop and only use them for small, quick, cheap jobs. Have had people bring me cars they have used spray can primer and more than not have problems.

Now you do not have to go big with the high end paint. I have done many jobs with cheaper/mid grade paint systems and they look great. And they are a lot cheaper than the high end stuff. But I use the epoxy, primer, paint all from the same system. Although sometimes I will put the better clear over top for the better uv protection.

I have been using PPG for too long lol. But they have the cheaper grades such as Omni, Shopeline that work well.

IMO the most important part is getting the epoxy down first.

There are many more steps like you could have 1a) 1b) etc. but these basics will get you in the right direction and eliminate many of the problems people have doing body/paint work.

Lou

lavron
Site Admin
Posts: 4710
Joined: Sat Nov 01, 2003 9:17 am
Location: Missouri, Ozarks
Contact:

Re: Lavron's '64 Build Thread

Post by lavron »

Thanks for the advice and steps Lou.

I don't have a lot of selection on paint where I am, basically whatever O'Reillys has or order online, that is why I said I was considering Eastwoods.

Certainly I am not looking to have a show car, or even that nice of car just want to get some cover on it to keep it from rusting away, I kinda did a bit more on the hood than I intended at this time :roll:

My hood is not totally true, it has highs and lows but I think it is close enough for me, I had talked about skim coating it and blocking it but probably won't, I will just block out the primer and call it good :P

I did get a coat of black primer on it today after the last fiasco I just stripped the primer and glaze down to metal and used Bondo to fix it, like I should have in the first place, it is looking pretty good to me but I still need to do a little more work in the center front filet, but at this point it is a little proud and not an indent so I should be able to block it down.

Image

From this point I am going to block it down with 220 re-pime and, hopefully, block it again with 320 and call it good for now, I might put a coat of primer and not sand it until later when I can get around to painting it.

On a separate not, FedEx delivered this today.

Image

Looks pretty good and has a nice thick mounting flange, all stainless, I will try and mock it up again soon and check to see how my starter clearance is.

See Ya,
Mike
Mike's build thread
viewtopic.php?f=9&t=13058
Image

lavron
Site Admin
Posts: 4710
Joined: Sat Nov 01, 2003 9:17 am
Location: Missouri, Ozarks
Contact:

Re: Lavron's '64 Build Thread

Post by lavron »

Rain took me away from putting any more primer on my hood today (sometimes working outside can be a bite) so I mocked up my new header, still going to have to do some mods but I think they are doable.

Image

The lower/front pipe is touching the starter and the bell housing, the top/rear pipe won't go on at all. Not too worried about the front one I think there is enough length to have it bent to clear everything.

The problem is the back one, it will almost go on but the collector kinda turns back toward the starter and it would have to be able to be bent tightly to clear. Not sure if the collector set could be bent away from the engine (not sure how hard it would be to bend all three pipes) I might be able to bolt everything together tight and jack it away from the engine (makes me a little nervous) or maybe a muffler shop could bend that rear pipe that close to the end.

I have also thought about cutting the flanges off and having the pipes welded on directly and putting the flanges back by the transmission.

See Ya,
Mike
Mike's build thread
viewtopic.php?f=9&t=13058
Image

Rocket989
Posts: 1678
Joined: Sat Jan 11, 2014 2:53 pm
Location: Kansas City Metro

Re: Lavron's '64 Build Thread

Post by Rocket989 »

Mike - How would the bolt holes line up if you cut it in half and used the front on back & vice-versa??
'cause Johno says you gotta have a sig pic! :)
Image

lavron
Site Admin
Posts: 4710
Joined: Sat Nov 01, 2003 9:17 am
Location: Missouri, Ozarks
Contact:

Re: Lavron's '64 Build Thread

Post by lavron »

Rocket989 wrote:Mike - How would the bolt holes line up if you cut it in half and used the front on back & vice-versa??
Not at all, the problem with that is the center siamese port.

See Ya,
Mike
Mike's build thread
viewtopic.php?f=9&t=13058
Image

lavron
Site Admin
Posts: 4710
Joined: Sat Nov 01, 2003 9:17 am
Location: Missouri, Ozarks
Contact:

Re: Lavron's '64 Build Thread

Post by lavron »

I might could put a racing starter on that could be clocked more to the inside, but was trying to stick with off the shelf parts, especially for items that can break easily like starters.

See Ya,
Mike
Mike's build thread
viewtopic.php?f=9&t=13058
Image

Rocket989
Posts: 1678
Joined: Sat Jan 11, 2014 2:53 pm
Location: Kansas City Metro

Re: Lavron's '64 Build Thread

Post by Rocket989 »

Crud - yeah...lack of I6 knowledge showing. Making the rear tubes work sure looks like cutting, extending, and getting collector back on. Might as well do same for front then too...lotta work and it's stainless... Will keep noodling...new/ custom flanges might be easier. That looks like a mini starter already?? I'd want an inch+ and wrap the header.
'cause Johno says you gotta have a sig pic! :)
Image

lavron
Site Admin
Posts: 4710
Joined: Sat Nov 01, 2003 9:17 am
Location: Missouri, Ozarks
Contact:

Re: Lavron's '64 Build Thread

Post by lavron »

Rocket989 wrote:That looks like a mini starter already??
Yes it a Mustang V6 Starter

I couldn't find this picture earlier (I knew I took it) it shows a little better, the top one is a little ways away from hitting the starter just it points toward it.

Image

See Ya,
Mike
Mike's build thread
viewtopic.php?f=9&t=13058
Image

User avatar
SASSY
Moderator
Posts: 5147
Joined: Sat Jan 07, 2006 12:32 am
Location: Wynndel, BC CANADA

Re: Lavron's '64 Build Thread

Post by SASSY »

man those a pretty headers to cut up,,, how 'bout a tapered flange that would tip the headers out at the head.
try putting a couple washers under the bottom of the flange to see how much taper you would need.
I'd rather do it myself if it's done right or not,,,isn't that what hotrodding is all about

Image

popscomet
Posts: 9693
Joined: Sat Jan 01, 2011 11:19 pm
Location: Jacksonville, Arkansas

Re: Lavron's '64 Build Thread

Post by popscomet »

I took an exhaust header gasket to work and had the boilermakers cut another exzact flange and used it as a spacer to set the header out just a tad,to clear and give me some slack...it was on a race truck,,it took some work ,,,but it did work,,,,and another set of gaskets,also...POP
Image
pop/glenda

lavron
Site Admin
Posts: 4710
Joined: Sat Nov 01, 2003 9:17 am
Location: Missouri, Ozarks
Contact:

Re: Lavron's '64 Build Thread

Post by lavron »

SASSY wrote:man those a pretty headers to cut up,,, how 'bout a tapered flange that would tip the headers out at the head.
try putting a couple washers under the bottom of the flange to see how much taper you would need.
You give me one idea Fred, did you notice how thick the mounting flange is in the picture above? Wonder about tilting it in slightly at the top buy having it milled with a little taper? The only thing would be needing to cut a relief for the bolt heads. I think I actually have a set of stainless studs someplace.
popscomet wrote:I took an exhaust header gasket to work and had the boilermakers cut another exzact flange and used it as a spacer to set the header out just a tad,to clear and give me some slack...it was on a race truck,,it took some work ,,,but it did work,,,,and another set of gaskets,also...POP
Might be the those added as well. I know if I can just tilt them slightly at the mount it will make a big difference on down at the bottom.

They are really heavy wall (and SS) so I am sure bending them is out if the question.

This is probably why everyone said not to use the 168 tooth flywheel :roll: but I think I can get it figured out, especially with you guys giving me ideas :P

See Ya,
Mike
Mike's build thread
viewtopic.php?f=9&t=13058
Image

popscomet
Posts: 9693
Joined: Sat Jan 01, 2011 11:19 pm
Location: Jacksonville, Arkansas

Re: Lavron's '64 Build Thread

Post by popscomet »

I had forgot about doing that,til I read what fred said and then it came back to me....this was way back in the 80's,,,but I can't take credit for being that sharp...about that time I had bought a B and m super charger at a local speed shop for a 289 and along with it came a pair of alumn machined spacer plates and a alumn plate to cover the lifter valley,,to be able to use the 289 super charger on a 351 w,,,that got me to thinking about spaceing the header out,,,,pop
Image
pop/glenda

lavron
Site Admin
Posts: 4710
Joined: Sat Nov 01, 2003 9:17 am
Location: Missouri, Ozarks
Contact:

Re: Lavron's '64 Build Thread

Post by lavron »

Now if I can leave this alone until next week I will wet sand and put another coat on.

Image

I just stuck the trim and emblem on there that is why the trim is not quite straight, it isn't in there with anything but 1 bolt in the middle.

Far from perfect and I can see sanding marks. etc., but my goal was to get some paint on there to protect it, I will probably be sanding it back down later and doing a better job, it will work for now.

See Ya,
Mike
Mike's build thread
viewtopic.php?f=9&t=13058
Image

Post Reply