Lavron's '64 Build Thread
Re: Lavron's '64 Build Thread
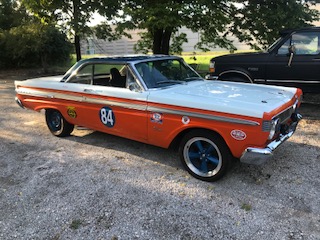
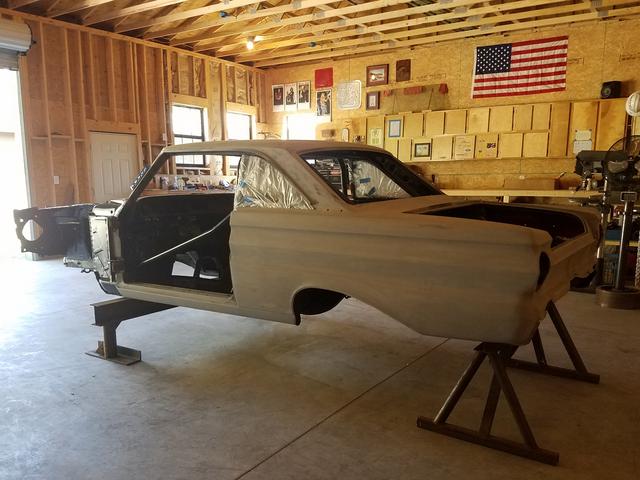
Yup, in the shed & parts off...diggin’ it!! Tally hooooooooo!! 
'cause Johno says you gotta have a sig pic! 
Re: Lavron's '64 Build Thread
Thanks guys for the encouragement, I really appreciate it and need it from time to time.
I picked the hottest weather we have had so far to do all this I am just going to try and take it slow and steady.
I did pick up another set of tall jack stands from Harbor Freight today so I will attempt to get the car higher, I guess I will try and use my engine hoist to slowly raise it because my floor jack has hit it's limit already.
See Ya,
Mike
I picked the hottest weather we have had so far to do all this
I did pick up another set of tall jack stands from Harbor Freight today so I will attempt to get the car higher, I guess I will try and use my engine hoist to slowly raise it because my floor jack has hit it's limit already.
See Ya,
Mike


Re: Lavron's '64 Build Thread
you will thank yourself later on. I put my rear in 1 time with only a floor jack & muscle. it almost fell ,I caught it but wished I'd let it go. I nearly dropped a man valvelavron wrote: I will attempt to get the car higher, I guess I will try and use my engine hoist to slowly raise it because my floor jack has hit it's limit already.
See Ya,
Mike
I just use a chunk of wood on top of my floor jack. a short piece of an 8x8 post. but several short pieces of 2x6s or 2x8s stacked up works too.

Johno
Re: Lavron's '64 Build Thread
Height is a wonderful thing when you're needing to get underneath, just make sure it's super stable.
Side note - I find it easier to use my cherry picker to pick it up one end at a time. I just use a longer chain and a piece of heavy square tube that spans frame rail to frame rail. Of course, hood, trunk lid and the gas tank have to be out of the way to go that way.
Dan
Side note - I find it easier to use my cherry picker to pick it up one end at a time. I just use a longer chain and a piece of heavy square tube that spans frame rail to frame rail. Of course, hood, trunk lid and the gas tank have to be out of the way to go that way.
Dan
Long time search complete, 65 Cyclone project in progress!

Re: Lavron's '64 Build Thread
I have some short chunks of railroad ties laying about.poboyjo65 wrote:I just use a chunk of wood on top of my floor jack. a short piece of an 8x8 post. but several short pieces of 2x6s or 2x8s stacked up works too.
I always check for stability before going under and potentially banging on stuff or pushing and pulling.bigdan wrote:Height is a wonderful thing when you're needing to get underneath, just make sure it's super stable.
Side note - I find it easier to use my cherry picker to pick it up one end at a time. I just use a longer chain and a piece of heavy square tube that spans frame rail to frame rail. Of course, hood, trunk lid and the gas tank have to be out of the way to go that way.
That was how I was going to do it, my gas tank is gone and I could avoid everything else, of course my engine is still in the car. Not sure if I have and heavy pipe or metal around, but I do have some oak 4x4s I could cut the proper length.
Thanks guys.
See Ya,
Mike
Re: Lavron's '64 Build Thread
Here's my "saw elephants" ("they're too big to be sawhorses, Dad!") I built a few years back. Plus the boys can get underneath with me without momma worrying  . Full disclosure; I slide my axle in from the side on dollies.
But enough of that - let's see this 4 link / air bag install!
Dan
But enough of that - let's see this 4 link / air bag install!
Dan
Long time search complete, 65 Cyclone project in progress!
Re: Lavron's '64 Build Thread
Great progress Lavron. Can't wait to see it in PF next year. Until then keep plucking away at her, Pugs.
302 roller
4 speed
Real cars are built to be driven and driven hard!!!
4 speed
Real cars are built to be driven and driven hard!!!
Re: Lavron's '64 Build Thread
Decided I needed to get smarter on getting this rear up in place to do the mock up, so I made a mockup rear axle.
I had a couple of 8" V8 axles that slip right in chainlink fence rail (1 1/2" I think) I had some of that as well so I cut a length so when the axles were shoved in there the mounting faces would match the 8.8 faces (at the outside face of the discs) and duct taped them in to keep them from sliding out.

It was much easier to put it under the car, bolt the wheels on and lift it into position and sit it on some jack stands, I could then position it up and down, side to side and front to back until I had what I liked, this is how it fit.

It isn't really too much lower on ride height than original (1-1 1/2" lower), but I think the larger wheels make it appear lower, right now I like it.

Now for the problems/issues I will have to tub it somewhat, but the tubbing needs to be on the outside and toward the rear, I am not sure it needs any in the fronts.

You can see there is very little clearance on the outside rear wheelhouse. On the other hand the axle bump stops don't hit anything but they are in the wrong place and they may be too low to allow the axle to travel up enough, so I will probably just remove them, the same may hold true for the pinion snubber.

Do you guys think I should go ahead and cut the wheel tubs or wait until I get the brackets all welded on to check clearance more precisely? I do think I will cut the rotted section of the trunk floor out so I can have more room to work and weld, it looks like the crossmember won't interfere with the bag brackets I just hope the pumpkin misses it.
Next I will probably get the old exhaust out and probably pull the radiator so I can have room to lift the car slightly higher off the ground.
See Ya,
Mike
I had a couple of 8" V8 axles that slip right in chainlink fence rail (1 1/2" I think) I had some of that as well so I cut a length so when the axles were shoved in there the mounting faces would match the 8.8 faces (at the outside face of the discs) and duct taped them in to keep them from sliding out.
It was much easier to put it under the car, bolt the wheels on and lift it into position and sit it on some jack stands, I could then position it up and down, side to side and front to back until I had what I liked, this is how it fit.
It isn't really too much lower on ride height than original (1-1 1/2" lower), but I think the larger wheels make it appear lower, right now I like it.
Now for the problems/issues I will have to tub it somewhat, but the tubbing needs to be on the outside and toward the rear, I am not sure it needs any in the fronts.
You can see there is very little clearance on the outside rear wheelhouse. On the other hand the axle bump stops don't hit anything but they are in the wrong place and they may be too low to allow the axle to travel up enough, so I will probably just remove them, the same may hold true for the pinion snubber.
Do you guys think I should go ahead and cut the wheel tubs or wait until I get the brackets all welded on to check clearance more precisely? I do think I will cut the rotted section of the trunk floor out so I can have more room to work and weld, it looks like the crossmember won't interfere with the bag brackets I just hope the pumpkin misses it.
Next I will probably get the old exhaust out and probably pull the radiator so I can have room to lift the car slightly higher off the ground.
See Ya,
Mike
Re: Lavron's '64 Build Thread
Progress! Mockup or not, it's cool to see new parts get fitted up!
As for the tubs and clearance, I used the outer wheel well and fabbed my own inner. Once I had the originsl inner removed, I stuck the axles and wheels back in, checked for clearance then "nudged" it where i wanted it with a porta-power. Once I had clearance, I built my own inner off of that, if that makes sense.
Dan
Long time search complete, 65 Cyclone project in progress!
-
Jims65cyclone

- Posts: 2765
- Joined: Sun Nov 23, 2014 10:29 pm
- Location: Lexington, SC
Re: Lavron's '64 Build Thread
Duct tape is one of those universal tools, but I'm not sure I'd trust it to hold those wheels the precise distance apart that you need for an accurate mock-up. Why don't you drill a hole in the side of the fence rail about 6" or 8" in from each end, weld a nut over each hole and put a bolt through it to act as a set screw? It would suck to make a bunch of measurements, then find out the tape slipped and all your measurements were off. 
Jim
Jim

Re: Lavron's '64 Build Thread
it is really a rough mockup, I just wanted to get an idea if everything was going to clear ok before hoisting the actual rear up there to set the final measurements, I needed to know if I was going to have to cut any wheel wells out of the way, etc. And that is not just any duct tape, it is Gorilla TapeJims65cyclone wrote:Duct tape is one of those universal tools, but I'm not sure I'd trust it to hold those wheels the precise distance apart that you need for an accurate mock-up.
Yes pretty much, I will know more when I get the brackets and bars on so I think it will wait to cut anything until then, as tight as they look in that picture they are not touching at ride height, however I think they soon would the higher up they go. So once I can articulate the rear I can find out what has to come out.bigdan wrote:if that makes sense
See Ya,
Mike
Re: Lavron's '64 Build Thread
I had a dental appointment this morning so I chose what was supposed to be a quick project for the day, removing the radiator
Rats had already chewed the radiator hoses off so no need to disconnect those, it looked like a "unbolt 4 bolts and pull it out" the bottom 2 were still on nut clips (yes the near inaccessible ones) and both broke free of the clip, the top two were just bolts with nuts and came right off. The left side of the radiator mount was loose from the radiator anyway (had been from about two days after I put it in there new) so that only left the right side lower bolt to deal with, you know the one, under the battery tray and in front of the horn  so my next step was to remove the battery tray, I got the two bottom bolts out ok(ish) but the top bolts had been subject to battery acid, I guess, and no longer had flats on the heads, I ended up cutting the front bolt with the grinder and then just popping the rear one through the battery tray (I will get the rest out later) then the radiator was easy to get out the rest of the way
With the radiator out I cleaned up my tools and came into the A/C, it is entirely too hot and I had some other TO-DOs in the house.
See Ya,
Mike
Rats had already chewed the radiator hoses off so no need to disconnect those, it looked like a "unbolt 4 bolts and pull it out" the bottom 2 were still on nut clips (yes the near inaccessible ones) and both broke free of the clip, the top two were just bolts with nuts and came right off. The left side of the radiator mount was loose from the radiator anyway (had been from about two days after I put it in there new) so that only left the right side lower bolt to deal with, you know the one, under the battery tray and in front of the horn
With the radiator out I cleaned up my tools and came into the A/C, it is entirely too hot and I had some other TO-DOs in the house.
See Ya,
Mike
Re: Lavron's '64 Build Thread
If there’s a Comet out there with with original battery tray metal that ISN’T a little crusty...I haven’t seen it!!
'cause Johno says you gotta have a sig pic!
Re: Lavron's '64 Build Thread
Not a lot today but I got the exhaust system out of the Comet.

The fun part was removing the header, if you think it is a lot fun to put on or remove long tube headers from a V8 try it on a I6 sometime, even though the engine is narrower shoving 6 pipes and two collectors down in-between the frame and the starter, etc. can be an exercise in frustration, it is like trying to do one of those spike nail puzzles where you have to unlink the two bent up nails except on a grand scale.
I ended up removing the starter, the carb linkage, the idler arm so the center link would drop down, and finally unbolting the motor mounts and jacking the engine up as much as could so they would "slip" out the bottom, and the aftermath;

I went ahead and pulled the carbs off as well and bagged them up until I can rebuild them. I guess all that stuff needs disconnected anyway so I can pull the motor so I am working ahead
That big pile of acorns you see on the floor in the engine picture came out of the header, I wonder how they got there
Also I discovered the center exhaust port divider was still welded in place (the gasket was worse for wear), that is good, even though I thought it had broken loose, I think the rattle in the exhaust was the collector flanges were both loose and one was missing a bolt even, made them easy to get the bolts out however.
See Ya,
Mike
The fun part was removing the header, if you think it is a lot fun to put on or remove long tube headers from a V8 try it on a I6 sometime, even though the engine is narrower shoving 6 pipes and two collectors down in-between the frame and the starter, etc. can be an exercise in frustration, it is like trying to do one of those spike nail puzzles where you have to unlink the two bent up nails except on a grand scale.
I ended up removing the starter, the carb linkage, the idler arm so the center link would drop down, and finally unbolting the motor mounts and jacking the engine up as much as could so they would "slip" out the bottom, and the aftermath;
I went ahead and pulled the carbs off as well and bagged them up until I can rebuild them. I guess all that stuff needs disconnected anyway so I can pull the motor so I am working ahead
That big pile of acorns you see on the floor in the engine picture came out of the header, I wonder how they got there
Also I discovered the center exhaust port divider was still welded in place (the gasket was worse for wear), that is good, even though I thought it had broken loose, I think the rattle in the exhaust was the collector flanges were both loose and one was missing a bolt even, made them easy to get the bolts out however.
See Ya,
Mike
Re: Lavron's '64 Build Thread
Cooler today so I got the 170 and top loader 3 speed out this morning.

I thought it best right now before I raise the car up any higher, it is already a bite reaching down in there because I have to use the step ladder, also it meant hoisting the motor really high to get it out.
The only casualty was the rear valve cover bolt broke off when I hung it up on something, I thought about taking it out and then didn't, it is no big deal.
Now to get to work on stripping the rest of this down and removing the old suspension.

Plugging away.
See Ya,
Mike
I thought it best right now before I raise the car up any higher, it is already a bite reaching down in there because I have to use the step ladder, also it meant hoisting the motor really high to get it out.
The only casualty was the rear valve cover bolt broke off when I hung it up on something, I thought about taking it out and then didn't, it is no big deal.
Now to get to work on stripping the rest of this down and removing the old suspension.
Plugging away.
See Ya,
Mike